Hexo下Next博客配置

本文介绍Next主题相关的一些配置

1. 常用命令

1
2
3
4
5
6
7
hexo new "postName" #新建文章
hexo new page "pageName" #新建页面
hexo generate #生成静态页面至public目录
hexo server #开启预览访问端口(默认端口4000,'ctrl + c'关闭server)
hexo deploy #将.deploy目录部署到GitHub
hexo help #查看帮助
hexo version #查看Hexo的版本

2. live2d看板娘

GitHub - xiazeyu/live2d-widget-models: The model library for live2d-widget.js

安装模块

1
npm install --save hexo-helper-live2d

安装模型

1
npm install live2d-widget-model-hibiki

所有模型列表

1
2
3
4
5
6
7
8
9
10
11
12
13
14
15
16
17
18
19
20
21
22
live2d-widget-model-chitose
live2d-widget-model-epsilon2_1
live2d-widget-model-gf
live2d-widget-model-haru/01 (use npm install --save live2d-widget-model-haru)
live2d-widget-model-haru/02 (use npm install --save live2d-widget-model-haru)
live2d-widget-model-haruto
live2d-widget-model-hibiki
live2d-widget-model-hijiki
live2d-widget-model-izumi
live2d-widget-model-koharu
live2d-widget-model-miku
live2d-widget-model-ni-j
live2d-widget-model-nico
live2d-widget-model-nietzsche
live2d-widget-model-nipsilon
live2d-widget-model-nito
live2d-widget-model-shizuku
live2d-widget-model-tororo
live2d-widget-model-tsumiki
live2d-widget-model-unitychan
live2d-widget-model-wanko
live2d-widget-model-z16

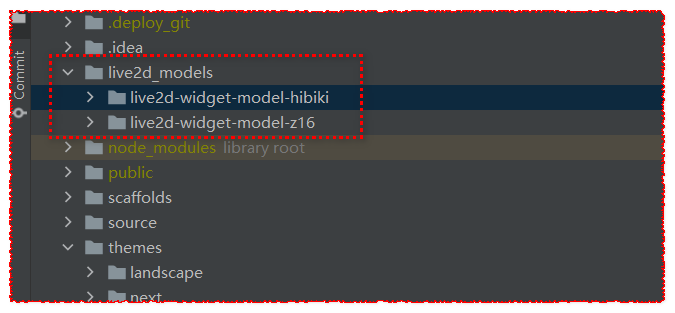
在主目录下新建一个live2d_models文件夹,将node_modules文件夹下live2d-widget-model-hibiki复制到live2d_models文件夹中

在主配置文件_config.yml添加配置

1
2
3
4
5
6
7
8
9
10
11
12
13
14
15
16
17
# 看板娘参数配置
live2d:
enable: true
scriptFrom: local
pluginRootPath: live2dw/
pluginJsPath: lib/
pluginModelPath: assets/
tagMode: false
debug: false
model:
use: live2d-widget-model-hibiki #下载模型参数
display:
position: right
width: 150
height: 300
mobile:
show: true

接着运行hexo s查看效果

3. hexo的next配置版权信息

在每篇文章末尾默认增加文章作者、链接以及版权信息,是部分博主所需要的,而Hexo的next(v7.1.0)主题默认就集成了该功能,只需要在设置中启用即可。配置方式简要描述,实际效果与下面信息类似。

1
2
3
本文作者: 何宇泽
本文链接: https://heyonggs.github.io
版权声明: 本博客所有文章除特别声明外,均采用 BY-NC-SA 许可协议。转载请注明出处!

配置步骤

修改next主题的配置文件(./themes/next/_config.yml),搜索到creative_commons:标签,

  • sidebar参数表示在侧边栏有一个版权的图片链接,
  • post参数表示在每一篇文章末尾自动增加本文作者、本文链接、版权声明三个信息,
  • language参数表示点击链接后显示的版权信息的语言。
1
2
3
4
5
creative_commons:
license: by-nc-sa
sidebar: true
post: true
language: deed.zh

如果想个性化配置版权信息,可修改配置文件(./themes/next/layout/_partials/post/post-copyright.swig),如果想修改显示的样式可修改配置文件(./themes/next/source/css/_common/components/post/post-copyright.styl) 。

4. 修改文章底部的那个带#号的标签

修改模板/themes/next/layout/_macro/post.swig,搜索 rel="tag">#,将 # 换成 <i class="fa fa-tag"></i>

1
2
3
4
5
<div class="post-tags">
{%- for tag in post.tags.toArray() %}
<a href="{{ url_for(tag.path) }}" rel="tag">{{ tag_indicate }} {{ tag.name }}</a>
{%- endfor %}
</div>

修改为

1
2
3
4
5
<div class="post-tags">
{% for tag in post.tags %}
<a href="{{ url_for(tag.path) }}" rel="tag"><i class="fa fa-tag"></i> {{ tag.name }}</a>
{% endfor %}
</div>

5. 右上角添加fork me on github

在主配置文件中打开github_banner配置,permalink修改为自己的github地址

1
2
3
4
github_banner:
enable: true
permalink: https://github.com/youname
title: Follow me on GitHub

6. Hexo为标题自动添加序号

在 Hexo 中,使用了一个 hexo 的插件, Hexo 根目录执行下面的命令

1
npm install hexo-heading-index --save

然后在 Hexo 根目录的 _config.yml 最后加上下面的配置:

1
2
3
4
5
6
heading_index:
enable: true
index_styles: "{1} {1} {1} {1} {1} {1}"
connector: "."
global_prefix: ""
global_suffix: ". "

7. hexo 取消“文章目录”的自动编号

修改主题配置文件那里的numberfalse

themes/next/_config.yml

1
2
3
4
toc:
enable: true
# Automatically add list number to toc.
number: false

8. 短地址

每次从博客分享文章给别人都很苦恼,Hexo 默认生成的链接太长了,而且一旦文章名字改变,链接也跟着改变。有没有什么方法让地址尽量短小精悍,同时永久化呢?

感谢 rozbo/hexo-abbrlink,完美解决此痛点。

使用方法也很简单:

  1. 在 Hexo 博客根目录,执行 npm install hexo-abbrlink --save
  2. 在主配置文件 _config.yml 写入
1
2
# 更改 permalink 值
permalink: p/:abbrlink.html

9. 自动部署hexo博客到阿里云服务器

https://blog.csdn.net/weixin_33790053/article/details/91366365

之前博客是托管在GitHub Page,访问速度不太乐观,后来买了台阿里云ECS,把博客迁了过来,下面介绍如何将博客直接推送到阿里云ECS(CentOS系统),实现自动部署。

9.1. 环境

  1. 博客网站在服务器上已经搭建好并且可以正常访问;
  2. 服务器上已经安装git;
  3. 本地hexo能够正常运行。

9.2. 思路

在阿里云服务器上搭建git仓库,本地博客目录下运行hexo g -d生成静态文件,并提交到git仓库,从而触发git hook,最后再执行bash命令将文件拷贝到博客网站目录。

9.3. 创建仓库

在阿里云服务器上创建git仓库,注意不要漏掉--bare参数。

1
2
mkdir /www/blog.git && cd /www/blog.git
git init --bare

9.4. Hexo配置

修改本地博客目录下的_config.yml配置,其中xx.xxx.xx.xxx是你的服务器ip地址,/www/blog.git是你上一步创建的git仓库路径,master是分支。

1
2
3
4
deploy:
type: git
message: update
repo: root@xx.xxx.xx.xxx:/www/blog.git,master

9.5. 插件安装

此插件的作用是执行deploy时,将hexo生成的静态文件提交到_config.yml配置中的deploy.repo地址,即root@xx.xxx.xx.xxx:/www/blog.git,master

1
npm install hexo-deployer-git --save

9.6. 自动部署

本地的deploy命令只是把静态文件提交到git仓库,既然有git hooks,那么我们可以在有文件提交上来时,再将文件拷贝到博客网站目录。 进入到git仓库hooks目录,并创建钩子post-receive

1
2
3
cd /www/blog.git/hooks
touch post-receive
vim post-receive

然后输入下面脚本:

1
2
3
4
5
6
7
8
#!/bin/bash -l
GIT_REPO=/www/blog.git
TMP_GIT_CLONE=/www/tmp/blog
PUBLIC_WWW=/usr/share/nginx/html/
rm -rf ${TMP_GIT_CLONE}
git clone $GIT_REPO $TMP_GIT_CLONE
rm -rf ${PUBLIC_WWW}/*
cp -rf ${TMP_GIT_CLONE}/* ${PUBLIC_WWW}

其中/www/blog.git为仓库路径,/www/blog为你的博客网站路径,/www/tmp/blog是临时目录,git会先将文件拉到临时目录,然后再将所有文件拷贝到博客网站目录/www/blog

更改目录权限:

1
2
3
4
chmod +x post-receive
mkdir -p /www/tmp/blog
chmod 777 -R /usr/share/nginx/html/
chmod 777 -R /www/blo

9.7. 运行

完成上述步骤之后,就可以测试一下了,在本地博客目录下运行hexo g -d,此时可能还需要输入服务器密码,最后输出以下结果说明部署成功:

1
2
...
INFO Deploy done: git

10. 修改主题页面布局为圆角

打开文件,路径:\themes\next\source\css_variables\Gemini.styl ,添加以下代码:

1
2
3
// 修改主题页面布局为圆角
$border-radius-inner = 15px 15px 15px 15px;
$border-radius = 15px;

11. 增加 canvas 粒子时钟

https://tding.top/archives/dd68b70.html

/themes/next/layout/_custom/ 目录下,新建 clock.swig 文件,内容如下:

1
2
3
4
5
6
7
8
9
10
11
12
13
14
15
16
17
18
19
20
21
22
23
24
25
26
27
28
29
30
31
32
33
34
35
36
37
38
39
40
41
42
43
44
45
46
47
48
49
50
51
52
53
54
55
56
57
58
59
60
61
62
63
64
65
66
67
68
69
70
71
72
73
74
75
76
77
78
79
80
81
82
83
84
85
86
87
88
89
90
91
92
93
94
95
96
97
98
99
100
101
102
103
104
105
106
107
108
109
110
111
112
113
114
115
116
117
118
119
120
121
122
123
124
125
126
127
128
129
130
131
132
133
134
135
136
137
138
139
140
141
142
143
144
145
146
147
148
149
150
151
152
153
154
155
156
157
158
159
160
161
162
163
164
165
166
167
168
169
170
171
172
173
174
175
176
177
178
179
180
181
182
183
184
185
186
187
188
189
190
191
192
193
194
195
196
197
198
199
200
201
202
203
204
205
206
207
208
209
210
211
212
213
214
215
216
217
218
219
220
221
222
223
224
225
226
227
228
229
230
231
232
233
234
235
236
237
238
239
240
241
242
243
244
245
246
247
248
249
250
251
252
253
254
255
256
257
258
259
260
261
262
263
264
<div style="">
<canvas id="canvas" style="width:60%;">当前浏览器不支持canvas,请更换浏览器后再试</canvas>
</div>
<script>
(function(){

var digit=
[
[
[0,0,1,1,1,0,0],
[0,1,1,0,1,1,0],
[1,1,0,0,0,1,1],
[1,1,0,0,0,1,1],
[1,1,0,0,0,1,1],
[1,1,0,0,0,1,1],
[1,1,0,0,0,1,1],
[1,1,0,0,0,1,1],
[0,1,1,0,1,1,0],
[0,0,1,1,1,0,0]
],//0
[
[0,0,0,1,1,0,0],
[0,1,1,1,1,0,0],
[0,0,0,1,1,0,0],
[0,0,0,1,1,0,0],
[0,0,0,1,1,0,0],
[0,0,0,1,1,0,0],
[0,0,0,1,1,0,0],
[0,0,0,1,1,0,0],
[0,0,0,1,1,0,0],
[1,1,1,1,1,1,1]
],//1
[
[0,1,1,1,1,1,0],
[1,1,0,0,0,1,1],
[0,0,0,0,0,1,1],
[0,0,0,0,1,1,0],
[0,0,0,1,1,0,0],
[0,0,1,1,0,0,0],
[0,1,1,0,0,0,0],
[1,1,0,0,0,0,0],
[1,1,0,0,0,1,1],
[1,1,1,1,1,1,1]
],//2
[
[1,1,1,1,1,1,1],
[0,0,0,0,0,1,1],
[0,0,0,0,1,1,0],
[0,0,0,1,1,0,0],
[0,0,1,1,1,0,0],
[0,0,0,0,1,1,0],
[0,0,0,0,0,1,1],
[0,0,0,0,0,1,1],
[1,1,0,0,0,1,1],
[0,1,1,1,1,1,0]
],//3
[
[0,0,0,0,1,1,0],
[0,0,0,1,1,1,0],
[0,0,1,1,1,1,0],
[0,1,1,0,1,1,0],
[1,1,0,0,1,1,0],
[1,1,1,1,1,1,1],
[0,0,0,0,1,1,0],
[0,0,0,0,1,1,0],
[0,0,0,0,1,1,0],
[0,0,0,1,1,1,1]
],//4
[
[1,1,1,1,1,1,1],
[1,1,0,0,0,0,0],
[1,1,0,0,0,0,0],
[1,1,1,1,1,1,0],
[0,0,0,0,0,1,1],
[0,0,0,0,0,1,1],
[0,0,0,0,0,1,1],
[0,0,0,0,0,1,1],
[1,1,0,0,0,1,1],
[0,1,1,1,1,1,0]
],//5
[
[0,0,0,0,1,1,0],
[0,0,1,1,0,0,0],
[0,1,1,0,0,0,0],
[1,1,0,0,0,0,0],
[1,1,0,1,1,1,0],
[1,1,0,0,0,1,1],
[1,1,0,0,0,1,1],
[1,1,0,0,0,1,1],
[1,1,0,0,0,1,1],
[0,1,1,1,1,1,0]
],//6
[
[1,1,1,1,1,1,1],
[1,1,0,0,0,1,1],
[0,0,0,0,1,1,0],
[0,0,0,0,1,1,0],
[0,0,0,1,1,0,0],
[0,0,0,1,1,0,0],
[0,0,1,1,0,0,0],
[0,0,1,1,0,0,0],
[0,0,1,1,0,0,0],
[0,0,1,1,0,0,0]
],//7
[
[0,1,1,1,1,1,0],
[1,1,0,0,0,1,1],
[1,1,0,0,0,1,1],
[1,1,0,0,0,1,1],
[0,1,1,1,1,1,0],
[1,1,0,0,0,1,1],
[1,1,0,0,0,1,1],
[1,1,0,0,0,1,1],
[1,1,0,0,0,1,1],
[0,1,1,1,1,1,0]
],//8
[
[0,1,1,1,1,1,0],
[1,1,0,0,0,1,1],
[1,1,0,0,0,1,1],
[1,1,0,0,0,1,1],
[0,1,1,1,0,1,1],
[0,0,0,0,0,1,1],
[0,0,0,0,0,1,1],
[0,0,0,0,1,1,0],
[0,0,0,1,1,0,0],
[0,1,1,0,0,0,0]
],//9
[
[0,0,0,0,0,0,0],
[0,0,1,1,1,0,0],
[0,0,1,1,1,0,0],
[0,0,1,1,1,0,0],
[0,0,0,0,0,0,0],
[0,0,0,0,0,0,0],
[0,0,1,1,1,0,0],
[0,0,1,1,1,0,0],
[0,0,1,1,1,0,0],
[0,0,0,0,0,0,0]
]//:
];

var canvas = document.getElementById('canvas');

if(canvas.getContext){
var cxt = canvas.getContext('2d');
//声明canvas的宽高
var H = 100,W = 700;
canvas.height = H;
canvas.width = W;
cxt.fillStyle = '#f00';
cxt.fillRect(10,10,50,50);

//存储时间数据
var data = [];
//存储运动的小球
var balls = [];
//设置粒子半径
var R = canvas.height/20-1;
(function(){
var temp = /(\d)(\d):(\d)(\d):(\d)(\d)/.exec(new Date());
//存储时间数字,由十位小时、个位小时、冒号、十位分钟、个位分钟、冒号、十位秒钟、个位秒钟这7个数字组成
data.push(temp[1],temp[2],10,temp[3],temp[4],10,temp[5],temp[6]);
})();

/*生成点阵数字*/
function renderDigit(index,num){
for(var i = 0; i < digit[num].length; i++){
for(var j = 0; j < digit[num][i].length; j++){
if(digit[num][i][j] == 1){
cxt.beginPath();
cxt.arc(14*(R+2)*index + j*2*(R+1)+(R+1),i*2*(R+1)+(R+1),R,0,2*Math.PI);
cxt.closePath();
cxt.fill();
}
}
}
}

/*更新时钟*/
function updateDigitTime(){
var changeNumArray = [];
var temp = /(\d)(\d):(\d)(\d):(\d)(\d)/.exec(new Date());
var NewData = [];
NewData.push(temp[1],temp[2],10,temp[3],temp[4],10,temp[5],temp[6]);
for(var i = data.length-1; i >=0 ; i--){
//时间发生变化
if(NewData[i] !== data[i]){
//将变化的数字值和在data数组中的索引存储在changeNumArray数组中
changeNumArray.push(i+'_'+(Number(data[i])+1)%10);
}
}
//增加小球
for(var i = 0; i< changeNumArray.length; i++){
addBalls.apply(this,changeNumArray[i].split('_'));
}
data = NewData.concat();
}

/*更新小球状态*/
function updateBalls(){
for(var i = 0; i < balls.length; i++){
balls[i].stepY += balls[i].disY;
balls[i].x += balls[i].stepX;
balls[i].y += balls[i].stepY;
if(balls[i].x > W + R || balls[i].y > H + R){
balls.splice(i,1);
i--;
}
}
}

/*增加要运动的小球*/
function addBalls(index,num){
var numArray = [1,2,3];
var colorArray = ["#3BE","#09C","#A6C","#93C","#9C0","#690","#FB3","#F80","#F44","#C00"];
for(var i = 0; i < digit[num].length; i++){
for(var j = 0; j < digit[num][i].length; j++){
if(digit[num][i][j] == 1){
var ball = {
x:14*(R+2)*index + j*2*(R+1)+(R+1),
y:i*2*(R+1)+(R+1),
stepX:Math.floor(Math.random() * 4 -2),
stepY:-2*numArray[Math.floor(Math.random()*numArray.length)],
color:colorArray[Math.floor(Math.random()*colorArray.length)],
disY:1
};
balls.push(ball);
}
}
}
}

/*渲染*/
function render(){
//重置画布宽度,达到清空画布的效果
canvas.height = 100;
//渲染时钟
for(var i = 0; i < data.length; i++){
renderDigit(i,data[i]);
}
//渲染小球
for(var i = 0; i < balls.length; i++){
cxt.beginPath();
cxt.arc(balls[i].x,balls[i].y,R,0,2*Math.PI);
cxt.fillStyle = balls[i].color;
cxt.closePath();
cxt.fill();
}
}

clearInterval(oTimer);
var oTimer = setInterval(function(){
//更新时钟
updateDigitTime();
//更新小球状态
updateBalls();
//渲染
render();
},50);
}

})();
</script>

/themes/next/layout/_custom/sidebar.swig 中引入:

1
{% include './clock.swig' %}

/themes/next/layout/_macro/sidebar.swig 中引入:

1
2
3
4
5
6
7
8
9
10
11
12
13
14
15
16
17
18
19
20
21
22
23
24
25
26
27
28
29
30
31
      <div class="site-overview-wrap sidebar-panel{% if not display_toc or toc(page.content).length <= 1 %} sidebar-panel-active{% endif %}">
<div class="site-overview">

...

{% if theme.recent_posts %}
<div class="links-of-blogroll motion-element {{ "links-of-blogroll-" + theme.recent_posts_layout }}">
<div class="links-of-blogroll-title">
<!-- modify icon to fire by szw -->
<i class="fa fa-history fa-{{ theme.recent_posts_icon | lower }}" aria-hidden="true"></i>
{{ theme.recent_posts_title }}
</div>
<ul class="links-of-blogroll-list">
{% set posts = site.posts.sort('-date') %}
{% for post in posts.slice('0', '5') %}
<li>
<a href="{{ url_for(post.path) }}" title="{{ post.title }}" target="_blank">{{ post.title }}</a>
</li>
{% endfor %}
</ul>
</div>
{% endif %}

+ {% if theme.custom_file_path.sidebar %}
+ {% set custom_sidebar = '../../../../' + theme.custom_file_path.sidebar %}
+ {% else %}
+ {% set custom_sidebar = '../_custom/sidebar.swig' %}
+ {% endif %}
+ {% include custom_sidebar %}
</div>
</div>

这里我放在到顶部按钮上面

canvas 粒子时钟样式

/themes/next/source/css/_custom/custom.styl 添加:

1
2
3
4
5
6
7
8
// 粒子时钟样式
.site-overview {
text-align: center;
}

canvas#canvas {
margin-top: 20px;
}

注:另一款样式:https://www.html5tricks.com/html5-canvas-dance-time.html

12. 文章评分功能

widgetpack:https://widgetpack.com/

NexT主题中已经集成了widgetpack的星级评分功能,只需注册账号后,修改主题配置文件:

1
2
3
4
5
6
# Star rating support to each article.
# To get your ID visit https://widgetpack.com
rating:
enable: true
id: your id #<app_id>
color: ff9800

13. 网站运行时间

打开.\themes\next\layout\_partials\footer.swig并在最后面添加下列代码

1
2
3
4
5
6
7
8
9
10
11
12
13
14
15
16
17
18
19
<div>
<span id="timeDate">载入天数...</span><span id="times">载入时分秒...</span>
<script>
var now = new Date();
function createtime() {
var grt= new Date("03/04/2015 00:00:00");
now.setTime(now.getTime()+250);
days = (now - grt ) / 1000 / 60 / 60 / 24; dnum = Math.floor(days);
hours = (now - grt ) / 1000 / 60 / 60 - (24 * dnum); hnum = Math.floor(hours);
if(String(hnum).length ==1 ){hnum = "0" + hnum;} minutes = (now - grt ) / 1000 /60 - (24 * 60 * dnum) - (60 * hnum);
mnum = Math.floor(minutes); if(String(mnum).length ==1 ){mnum = "0" + mnum;}
seconds = (now - grt ) / 1000 - (24 * 60 * 60 * dnum) - (60 * 60 * hnum) - (60 * mnum);
snum = Math.round(seconds); if(String(snum).length ==1 ){snum = "0" + snum;}
document.getElementById("timeDate").innerHTML = "本站已安全运行 "+dnum+" 天 ";
document.getElementById("times").innerHTML = hnum + " 小时 " + mnum + " 分 " + snum + " 秒";
}
setInterval("createtime()",250);
</script>
</div>

14. 阅读全文按钮开启

我们首先找到在next主题下的_config.yml代码:

1
2
3
4
5
# Automatically Excerpt. Not recommand.
# Please use <!-- more --> in the post to control excerpt accurately.
auto_excerpt:
enable: false
length: 150

将false修改为true即可,length是显示摘要的长度。

如过需要自动控制可在文章中输入来控制,不生效可用来控制。

15. 配置实时聊天

https://www.tidiochat.com

一个实时聊天客服系统tidio

首先需要去tidio官网注册一个账户,注册地址:https://www.tidio.com/panel/register

注册后填好网站,然后获取Public Key,获取地址:https://www.tidiochat.com/panel/settings/developer

我们首先找到在next主题下的_config.yml代码:

1
2
3
tidio:
enable: false
key:

将enable修改为true,然后输入tidio控制台获取的key

16. 设置头像圆角及旋转

将头像图片放入目录:/themes/next/source/images

重命名为:avatar.[格式]

找到next主题配置文件_config.yml下的代码

1
2
3
4
5
6
7
avatar:
# Replace the default image and set the url here.
url: /images/avatar.jpg
# If true, the avatar will be dispalyed in circle.
rounded: false
# If true, the avatar will be rotated with the cursor.
rotated: false

url:头像图片路径

rounded:头像显示圆圈配置

rotated:头像随鼠标旋转

17. 设置背景彩带

https://github.com/theme-next/theme-next-canvas-ribbon

https://github.com/zproo/canvas-ribbon

17.1. 方法一

转到 NexT 目录

1
2
3
$ cd themes/next
$ ls
_config.yml crowdin.yml docs gulpfile.js languages layout LICENSE.md package.json README.md scripts source

获取模块

将模块安装到 source/lib 目录:

1
$ git clone https://github.com/theme-next/theme-next-canvas-ribbon source/lib/canvas-ribbon

设置

在 NexT _config.yml 文件中启用模块:

1
2
3
4
5
canvas_ribbon:
enable: true
size: 90
alpha: 0.6
zIndex: -1

自定义背景彩带的宽度、透明度和z-index属性

  • size: 彩带宽度, 默认: 90.
  • alpha: 彩带透明度, 默认: 0.6.
  • zIndex: 彩带html标签的z-index属性, 默认: -1.

17.2. 方法二

使用CDN的方式,在 NexT _config.yml 文件中启用canvas_ribbon链接:

1
2
3
vendors:
...
canvas_ribbon: //cdn.jsdelivr.net/gh/theme-next/theme-next-canvas-ribbon@1/canvas-ribbon.js

在 NexT _config.yml 文件中启用模块:

1
2
3
4
5
canvas_ribbon:
enable: true
size: 9
alpha: 0.6
zIndex: -1

18. 添加动态背景

https://github.com/theme-next/theme-next-canvas-nest

在主题文件夹下 next/layout/_partials/footer.swig文件最后面添加

1
2
3
<div>
<script color="0,0,255" opacity="0.5" zIndex="-1" count="99" src="https://cdn.jsdelivr.net/npm/canvas-nest.js@1/dist/canvas-nest.js"></script>
</div>

19. 设置代码块样式

代码块的行号显示在上面已经介绍了,位于站点配置文件,对于代码块的主题我么还能设置其背景,增加复制按钮等,可修改主题配置文件如下:

1
2
3
4
5
6
7
8
9
10
11
12
codeblock:
# Code Highlight theme
# Available values: normal | night | night eighties | night blue | night bright | solarized | solarized dark | galactic
# See: https://github.com/chriskempson/tomorrow-theme
highlight_theme: night
# Add copy button on codeblock
copy_button:
enable: true
# Show text copy result.
show_result: true
# Available values: default | flat | mac
style: default

20. 修改文章链接样式

修改文件 themes\next\source\css_common\components\post\post.styl,在末尾添加如下css样式,:

1
2
3
4
5
6
7
8
9
10
11
// 文章内链接文本样式
.post-body p a{
color: #0593d3;
border-bottom: none;
border-bottom: 1px solid #0593d3;
&:hover {
color: #fc6423;
border-bottom: none;
border-bottom: 1px solid #fc6423;
}
}

21. 鼠标点击特效

下面是四个比较常用的鼠标点击特效脚本,我们可以把它们放置在 themes\next\source\js\cursor\ 目录下,创建fireworks.js文件:

礼花特效代码:

1
2
3
4
5
6
7
8
9
10
11
12
13
14
15
16
17
18
19
20
21
22
23
24
25
26
27
28
29
30
31
32
33
34
35
36
37
38
39
40
41
42
43
44
45
46
47
48
49
50
51
52
53
54
55
56
57
58
59
60
61
62
63
64
65
66
67
68
69
70
71
72
73
74
75
76
77
78
79
80
81
82
83
84
85
86
87
88
89
90
91
92
93
94
95
96
97
98
99
100
101
102
103
104
105
106
107
108
109
110
111
112
113
114
115
116
117
118
119
120
121
122
123
124
125
126
127
128
129
130
131
132
133
134
135
136
137
138
139
140
141
142
143
144
145
146
147
148
149
150
151
152
153
154
class Circle {
constructor({ origin, speed, color, angle, context }) {
this.origin = origin
this.position = { ...this.origin }
this.color = color
this.speed = speed
this.angle = angle
this.context = context
this.renderCount = 0
}

draw() {
this.context.fillStyle = this.color
this.context.beginPath()
this.context.arc(this.position.x, this.position.y, 2, 0, Math.PI * 2)
this.context.fill()
}

move() {
this.position.x = (Math.sin(this.angle) * this.speed) + this.position.x
this.position.y = (Math.cos(this.angle) * this.speed) + this.position.y + (this.renderCount * 0.3)
this.renderCount++
}
}

class Boom {
constructor ({ origin, context, circleCount = 16, area }) {
this.origin = origin
this.context = context
this.circleCount = circleCount
this.area = area
this.stop = false
this.circles = []
}

randomArray(range) {
const length = range.length
const randomIndex = Math.floor(length * Math.random())
return range[randomIndex]
}

randomColor() {
const range = ['8', '9', 'A', 'B', 'C', 'D', 'E', 'F']
return '#' + this.randomArray(range) + this.randomArray(range) + this.randomArray(range) + this.randomArray(range) + this.randomArray(range) + this.randomArray(range)
}

randomRange(start, end) {
return (end - start) * Math.random() + start
}

init() {
for(let i = 0; i < this.circleCount; i++) {
const circle = new Circle({
context: this.context,
origin: this.origin,
color: this.randomColor(),
angle: this.randomRange(Math.PI - 1, Math.PI + 1),
speed: this.randomRange(1, 6)
})
this.circles.push(circle)
}
}

move() {
this.circles.forEach((circle, index) => {
if (circle.position.x > this.area.width || circle.position.y > this.area.height) {
return this.circles.splice(index, 1)
}
circle.move()
})
if (this.circles.length == 0) {
this.stop = true
}
}

draw() {
this.circles.forEach(circle => circle.draw())
}
}

class CursorSpecialEffects {
constructor() {
this.computerCanvas = document.createElement('canvas')
this.renderCanvas = document.createElement('canvas')

this.computerContext = this.computerCanvas.getContext('2d')
this.renderContext = this.renderCanvas.getContext('2d')

this.globalWidth = window.innerWidth
this.globalHeight = window.innerHeight

this.booms = []
this.running = false
}

handleMouseDown(e) {
const boom = new Boom({
origin: { x: e.clientX, y: e.clientY },
context: this.computerContext,
area: {
width: this.globalWidth,
height: this.globalHeight
}
})
boom.init()
this.booms.push(boom)
this.running || this.run()
}

handlePageHide() {
this.booms = []
this.running = false
}

init() {
const style = this.renderCanvas.style
style.position = 'fixed'
style.top = style.left = 0
style.zIndex = '999999999999999999999999999999999999999999'
style.pointerEvents = 'none'

style.width = this.renderCanvas.width = this.computerCanvas.width = this.globalWidth
style.height = this.renderCanvas.height = this.computerCanvas.height = this.globalHeight

document.body.append(this.renderCanvas)

window.addEventListener('mousedown', this.handleMouseDown.bind(this))
window.addEventListener('pagehide', this.handlePageHide.bind(this))
}

run() {
this.running = true
if (this.booms.length == 0) {
return this.running = false
}

requestAnimationFrame(this.run.bind(this))

this.computerContext.clearRect(0, 0, this.globalWidth, this.globalHeight)
this.renderContext.clearRect(0, 0, this.globalWidth, this.globalHeight)

this.booms.forEach((boom, index) => {
if (boom.stop) {
return this.booms.splice(index, 1)
}
boom.move()
boom.draw()
})
this.renderContext.drawImage(this.computerCanvas, 0, 0, this.globalWidth, this.globalHeight)
}
}

const cursorSpecialEffects = new CursorSpecialEffects()
cursorSpecialEffects.init()

爆炸特效:

explosion.min.js代码:

1
2
"use strict";function updateCoords(e){pointerX=(e.clientX||e.touches[0].clientX)-canvasEl.getBoundingClientRect().left,pointerY=e.clientY||e.touches[0].clientY-canvasEl.getBoundingClientRect().top}function setParticuleDirection(e){var t=anime.random(0,360)*Math.PI/180,a=anime.random(50,180),n=[-1,1][anime.random(0,1)]*a;return{x:e.x+n*Math.cos(t),y:e.y+n*Math.sin(t)}}function createParticule(e,t){var a={};return a.x=e,a.y=t,a.color=colors[anime.random(0,colors.length-1)],a.radius=anime.random(16,32),a.endPos=setParticuleDirection(a),a.draw=function(){ctx.beginPath(),ctx.arc(a.x,a.y,a.radius,0,2*Math.PI,!0),ctx.fillStyle=a.color,ctx.fill()},a}function createCircle(e,t){var a={};return a.x=e,a.y=t,a.color="#F00",a.radius=.1,a.alpha=.5,a.lineWidth=6,a.draw=function(){ctx.globalAlpha=a.alpha,ctx.beginPath(),ctx.arc(a.x,a.y,a.radius,0,2*Math.PI,!0),ctx.lineWidth=a.lineWidth,ctx.strokeStyle=a.color,ctx.stroke(),ctx.globalAlpha=1},a}function renderParticule(e){for(var t=0;t<e.animatables.length;t++)e.animatables[t].target.draw()}function animateParticules(e,t){for(var a=createCircle(e,t),n=[],i=0;i<numberOfParticules;i++)n.push(createParticule(e,t));anime.timeline().add({targets:n,x:function(e){return e.endPos.x},y:function(e){return e.endPos.y},radius:.1,duration:anime.random(1200,1800),easing:"easeOutExpo",update:renderParticule}).add({targets:a,radius:anime.random(80,160),lineWidth:0,alpha:{value:0,easing:"linear",duration:anime.random(600,800)},duration:anime.random(1200,1800),easing:"easeOutExpo",update:renderParticule,offset:0})}function debounce(e,t){var a;return function(){var n=this,i=arguments;clearTimeout(a),a=setTimeout(function(){e.apply(n,i)},t)}}var canvasEl=document.querySelector(".fireworks");if(canvasEl){var ctx=canvasEl.getContext("2d"),numberOfParticules=30,pointerX=0,pointerY=0,tap="mousedown",colors=["#FF1461","#18FF92","#5A87FF","#FBF38C"],setCanvasSize=debounce(function(){canvasEl.width=2*window.innerWidth,canvasEl.height=2*window.innerHeight,canvasEl.style.width=window.innerWidth+"px",canvasEl.style.height=window.innerHeight+"px",canvasEl.getContext("2d").scale(2,2)},500),render=anime({duration:1/0,update:function(){ctx.clearRect(0,0,canvasEl.width,canvasEl.height)}});document.addEventListener(tap,function(e){"sidebar"!==e.target.id&&"toggle-sidebar"!==e.target.id&&"A"!==e.target.nodeName&&"IMG"!==e.target.nodeName&&(render.play(),updateCoords(e),animateParticules(pointerX,pointerY))},!1),setCanvasSize(),window.addEventListener("resize",setCanvasSize,!1)}

浮出爱心特效

love.min.js代码:

1
2
!function(e,t,a){function n(){c(".heart{width: 10px;height: 10px;position: fixed;background: #f00;transform: rotate(45deg);-webkit-transform: rotate(45deg);-moz-transform: rotate(45deg);}.heart:after,.heart:before{content: '';width: inherit;height: inherit;background: inherit;border-radius: 50%;-webkit-border-radius: 50%;-moz-border-radius: 50%;position: fixed;}.heart:after{top: -5px;}.heart:before{left: -5px;}"),o(),r()}function r(){for(var e=0;e<d.length;e++)d[e].alpha<=0?(t.body.removeChild(d[e].el),d.splice(e,1)):(d[e].y--,d[e].scale+=.004,d[e].alpha-=.013,d[e].el.style.cssText="left:"+d[e].x+"px;top:"+d[e].y+"px;opacity:"+d[e].alpha+";transform:scale("+d[e].scale+","+d[e].scale+") rotate(45deg);background:"+d[e].color+";z-index:99999");requestAnimationFrame(r)}function o(){var t="function"==typeof e.onclick&&e.onclick;e.onclick=function(e){t&&t(),i(e)}}function i(e){var a=t.createElement("div");a.className="heart",d.push({el:a,x:e.clientX-5,y:e.clientY-5,scale:1,alpha:1,color:s()}),t.body.appendChild(a)}function c(e){var a=t.createElement("style");a.type="text/css";try{a.appendChild(t.createTextNode(e))}catch(t){a.styleSheet.cssText=e}t.getElementsByTagName("head")[0].appendChild(a)}function s(){return"rgb("+~~(255*Math.random())+","+~~(255*Math.random())+","+~~(255*Math.random())+")"}var d=[];e.requestAnimationFrame=function(){return e.requestAnimationFrame||e.webkitRequestAnimationFrame||e.mozRequestAnimationFrame||e.oRequestAnimationFrame||e.msRequestAnimationFrame||function(e){setTimeout(e,1e3/60)}}(),n()}(window,document);

浮出文字特效

text.js代码:

1
2
3
4
5
6
7
8
9
10
11
12
13
14
15
16
17
18
19
20
21
22
23
24
25
var a_idx = 0;
jQuery(document).ready(function($) {
$("body").click(function(e) {
var a = new Array("喜欢我", "不喜欢我");
var $i = $("<span/>").text(a[a_idx]);
var x = e.pageX,
y = e.pageY;
$i.css({
"z-index": 99999,
"top": y - 28,
"left": x - a[a_idx].length * 8,
"position": "absolute",
"color": "#ff7a45"
});
$("body").append($i);
$i.animate({
"top": y - 180,
"opacity": 0
}, 1500, function() {
$i.remove();
});
a_idx = (a_idx + 1) % a.length;
});
});

然后我们在主题自定义布局文件 themes\next\layout\_custom\custom.swig 中添加以下代码:

1
2
3
4
5
6
7
8
9
10
11
12
{# 鼠标点击特效 #}
{% if theme.cursor_effect == "fireworks" %}
<script async src="/js/cursor/fireworks.js"></script>
{% elseif theme.cursor_effect == "explosion" %}
<canvas class="fireworks" style="position: fixed;left: 0;top: 0;z-index: 1; pointer-events: none;" ></canvas>
<script src="//cdn.bootcss.com/animejs/2.2.0/anime.min.js"></script>
<script async src="/js/cursor/explosion.min.js"></script>
{% elseif theme.cursor_effect == "love" %}
<script async src="/js/cursor/love.min.js"></script>
{% elseif theme.cursor_effect == "text" %}
<script async src="/js/cursor/text.js"></script>
{% endif %}

如果 custom.swig 文件不存在,我们可以手动新建这个文件并在布局页面 themes\next\layout\_layout.swig 中 body 末尾引入:

1
2
3
4
5
6
7
8
      ...
{% include '_third-party/exturl.swig' %}
{% include '_third-party/bookmark.swig' %}
{% include '_third-party/copy-code.swig' %}

+ {% include '_custom/custom.swig' %}
</body>
</html>

然后我们在主题配置文件中添加以下代码:

1
2
# mouse click effect: fireworks | explosion | love | text
cursor_effect: fireworks

这样即可在配置文件中一键快速切换鼠标点击特效。

22. 打字特效

我们需要添加下面这个脚本 activate-power-mode.min.js,然后放置在 themes\next\source\js\ 目录下:

1
(function webpackUniversalModuleDefinition(root,factory){if(typeof exports==='object'&&typeof module==='object')module.exports=factory();else if(typeof define==='function'&&define.amd)define([],factory);else if(typeof exports==='object')exports["POWERMODE"]=factory();else root["POWERMODE"]=factory()})(this,function(){return(function(modules){var installedModules={};function __webpack_require__(moduleId){if(installedModules[moduleId])return installedModules[moduleId].exports;var module=installedModules[moduleId]={exports:{},id:moduleId,loaded:false};modules[moduleId].call(module.exports,module,module.exports,__webpack_require__);module.loaded=true;return module.exports}__webpack_require__.m=modules;__webpack_require__.c=installedModules;__webpack_require__.p="";return __webpack_require__(0)})([function(module,exports,__webpack_require__){'use strict';var canvas=document.createElement('canvas');canvas.width=window.innerWidth;canvas.height=window.innerHeight;canvas.style.cssText='position:fixed;top:0;left:0;pointer-events:none;z-index:999999';window.addEventListener('resize',function(){canvas.width=window.innerWidth;canvas.height=window.innerHeight});document.body.appendChild(canvas);var context=canvas.getContext('2d');var particles=[];var particlePointer=0;POWERMODE.shake=true;function getRandom(min,max){return Math.random()*(max-min)+min}function getColor(el){if(POWERMODE.colorful){var u=getRandom(0,360);return'hsla('+getRandom(u-10,u+10)+', 100%, '+getRandom(50,80)+'%, '+1+')'}else{return window.getComputedStyle(el).color}}function getCaret(){var el=document.activeElement;var bcr;if(el.tagName==='TEXTAREA'||(el.tagName==='INPUT'&&el.getAttribute('type')==='text')){var offset=__webpack_require__(1)(el,el.selectionStart);bcr=el.getBoundingClientRect();return{x:offset.left+bcr.left,y:offset.top+bcr.top,color:getColor(el)}}var selection=window.getSelection();if(selection.rangeCount){var range=selection.getRangeAt(0);var startNode=range.startContainer;if(startNode.nodeType===document.TEXT_NODE){startNode=startNode.parentNode}bcr=range.getBoundingClientRect();return{x:bcr.left,y:bcr.top,color:getColor(startNode)}}return{x:0,y:0,color:'transparent'}}function createParticle(x,y,color){return{x:x,y:y,alpha:1,color:color,velocity:{x:-1+Math.random()*2,y:-3.5+Math.random()*2}}}function POWERMODE(){{var caret=getCaret();var numParticles=5+Math.round(Math.random()*10);while(numParticles--){particles[particlePointer]=createParticle(caret.x,caret.y,caret.color);particlePointer=(particlePointer+1)%500}}{if(POWERMODE.shake){var intensity=1+2*Math.random();var x=intensity*(Math.random()>0.5?-1:1);var y=intensity*(Math.random()>0.5?-1:1);document.body.style.marginLeft=x+'px';document.body.style.marginTop=y+'px';setTimeout(function(){document.body.style.marginLeft='';document.body.style.marginTop=''},75)}}};POWERMODE.colorful=false;function loop(){requestAnimationFrame(loop);context.clearRect(0,0,canvas.width,canvas.height);for(var i=0;i<particles.length;++i){var particle=particles[i];if(particle.alpha<=0.1)continue;particle.velocity.y+=0.075;particle.x+=particle.velocity.x;particle.y+=particle.velocity.y;particle.alpha*=0.96;context.globalAlpha=particle.alpha;context.fillStyle=particle.color;context.fillRect(Math.round(particle.x-1.5),Math.round(particle.y-1.5),3,3)}}requestAnimationFrame(loop);module.exports=POWERMODE},function(module,exports){(function(){var properties=['direction','boxSizing','width','height','overflowX','overflowY','borderTopWidth','borderRightWidth','borderBottomWidth','borderLeftWidth','borderStyle','paddingTop','paddingRight','paddingBottom','paddingLeft','fontStyle','fontVariant','fontWeight','fontStretch','fontSize','fontSizeAdjust','lineHeight','fontFamily','textAlign','textTransform','textIndent','textDecoration','letterSpacing','wordSpacing','tabSize','MozTabSize'];var isFirefox=window.mozInnerScreenX!=null;function getCaretCoordinates(element,position,options){var debug=options&&options.debug||false;if(debug){var el=document.querySelector('#input-textarea-caret-position-mirror-div');if(el){el.parentNode.removeChild(el)}}var div=document.createElement('div');div.id='input-textarea-caret-position-mirror-div';document.body.appendChild(div);var style=div.style;var computed=window.getComputedStyle?getComputedStyle(element):element.currentStyle;style.whiteSpace='pre-wrap';if(element.nodeName!=='INPUT')style.wordWrap='break-word';style.position='absolute';if(!debug)style.visibility='hidden';properties.forEach(function(prop){style[prop]=computed[prop]});if(isFirefox){if(element.scrollHeight>parseInt(computed.height))style.overflowY='scroll'}else{style.overflow='hidden'}div.textContent=element.value.substring(0,position);if(element.nodeName==='INPUT')div.textContent=div.textContent.replace(/\s/g,"\u00a0");var span=document.createElement('span');span.textContent=element.value.substring(position)||'.';div.appendChild(span);var coordinates={top:span.offsetTop+parseInt(computed['borderTopWidth']),left:span.offsetLeft+parseInt(computed['borderLeftWidth'])};if(debug){span.style.backgroundColor='#aaa'}else{document.body.removeChild(div)}return coordinates}if(typeof module!="undefined"&&typeof module.exports!="undefined"){module.exports=getCaretCoordinates}else{window.getCaretCoordinates=getCaretCoordinates}}())}])});

在主题自定义布局文件 themes\next\layout\_custom\custom.swig 中添加以下代码:

1
2
3
4
5
6
7
8
9
{# 打字特效 #}
{% if theme.typing_effect %}
<script src="/js/activate-power-mode.min.js"></script>
<script>
POWERMODE.colorful = {{ theme.typing_effect.colorful }};
POWERMODE.shake = {{ theme.typing_effect.shake }};
document.body.addEventListener('input', POWERMODE);
</script>
{% endif %}

如果 custom.swig 文件不存在,我们可以手动新建这个文件并在布局页面 themes\next\layout\_layout.swig 中 body 末尾引入:

1
2
3
4
5
6
7
8
      ...
{% include '_third-party/exturl.swig' %}
{% include '_third-party/bookmark.swig' %}
{% include '_third-party/copy-code.swig' %}

+ {% include '_custom/custom.swig' %}
</body>
</html>

然后我们在主题配置文件中添加以下代码:

1
2
3
4
# typing effect
typing_effect:
colorful: true # 礼花特效
shake: false # 震动特效

这样即可在配置文件中一键快速切换打字特效。

参考:

https://tding.top/archives/58cff12b.html

https://blog.csdn.net/qq_40590778/article/details/104662040

23. 字体调整

Next主题自带的字体是较大的,我这里给出了一个比较合适的方案:
1.打开/blog/themes/next/source/css/_variables/base.styl文件,查找Font size字段,将**$font-size-large**参数由1.125em改为1.0em

1
2
3
4
5
6
7
8
9
// Font size
$font-size-base = (hexo-config('font.enable') and hexo-config('font.global.size') is a 'unit') ? unit(hexo-config('font.global.size'), em) : 1em;
$font-size-smallest = .75em;
$font-size-smaller = .8125em;
$font-size-small = .875em;
$font-size-medium = 1em;
$font-size-large = 1.0em;
$font-size-larger = 1.25em;
$font-size-largest = 1.5em;

2.打开/blog/themes/next/_config.yml文件,查找Font Settings字段并修改如下:

1
2
3
4
5
6
7
8
9
10
11
12
13
14
15
16
17
18
19
20
21
22
23
24
25
26
27
28
29
30
31
32
33
34
35
36
37
38
39
40
41
42
43
44
45
46
47
48
49
50
51
52
# ---------------------------------------------------------------
# Font Settings
# ---------------------------------------------------------------
# Find fonts on Google Fonts (https://fonts.google.com)
# All fonts set here will have the following styles:
# light | light italic | normal | normal italic | bold | bold italic
# Be aware that setting too much fonts will cause site running slowly
# ---------------------------------------------------------------
# Web Safe fonts are recommended for `global` (and `title`):
# Arial | Tahoma | Helvetica | Times New Roman | Courier New | Verdana | Georgia | Palatino | Garamond | Comic Sans MS | Trebuchet MS
# ---------------------------------------------------------------

font:
enable: true

# Uri of fonts host, e.g. https://fonts.loli.net (Default).
host:

# Font options:
# `external: true` will load this font family from `host` above.
# `family: Times New Roman`. Without any quotes.
# `size: x.x`. Use `em` as unit. Default: 1 (16px)

# Global font settings used for all elements inside <body>.
global:
external: true
family: Lato
size:

# Font settings for site title (.site-title).
title:
external: true
family:
size:

# Font settings for headlines (<h1> to <h6>).
headings:
external: true
family:
size:

# Font settings for posts (.post-body).
posts:
external: true
family:
size: 0.8125

# Font settings for <code> and code blocks.
codes:
external: true
family:
size:

24. 修改代码块复制时背景颜色

next/source/css/scaffolding/highlight/theme.styl中修改$highlight-selection的颜色

1
$highlight-selection    = #154487;

25. 字体相关配置

主题配置文件 _config.yml 里与字体相关的配置项:

1
2
3
4
5
6
7
8
9
10
11
12
13
14
15
16
17
18
19
20
21
22
23
24
25
26
27
28
29
30
31
32
33
34
35
36
37
38
39
40
41
42
43
44
45
46
47
font:
enable: true
# CDN
host:

# Font options:
# `external: true` will load this font family from `host` above.
# `family: Times New Roman`. Without any quotes.
# `size: x.x`. Use `em` as unit. Default: 1 (16px)

# external: 控制是否使用 CDN。
# family: 字体样式。
# size: 字体大小。默认为 1(16px)。

# Global font settings used for all elements inside <body>.
# 全局配置,覆盖 <body> 标签里所有元素
global:
external: true
family:
size:

# Font settings for site title (.site-title).
# 博客名字那儿
title:
external: true
family:
size:

# Font settings for headlines (<h1> to <h6>).
# 注意这是文章里的标题,而不是侧边栏的 toc
headings:
external: true
family: #Roboto Mono
size:

# Font settings for posts (.post-body).
# 正文
posts:
external: true
family:
size:

# Font settings for <code> and code blocks.
# 代码块
codes:
external: true
family:

挑选并配置字体

Google Fonts 挑选一款字体,在配置里的 family 处添加即可。

1
2
3
4
5
6
font:
enable: true
global:
external: true
family: Noto Serif SC
size:

如此配置之后,基于 hexo-next-theme 的博客就会全局使用「思源宋体」。

同理,配置代码块的字体也只需要挑选并覆盖相应配置即可。如:

1
2
3
4
5
6
7
font:
enable: true
# ……
codes:
external: true
family: Roboto Mono
size:

googleapis

前端 CDNJS 库及 Google Fonts、Ajax 和 Gravatar 国内加速服务

国内访问fonts.googleapis.com 不太稳定,有时候很慢,用上面帖子里提供的 CDN,Next 的配置就可以这样:

1
2
3
font:
enable: true
host: //fonts.loli.net

配置之后如果还有加载googleapis字体的地方全局替换即可。

参考

https://www.liaofuzhan.com/posts/2114475547.html

https://tding.top/archives/2bd6d82.html

https://www.simon96.online/2018/10/12/hexo-tutorial/

https://blog.csdn.net/weixin_44815733/article/details/88817220

https://blog.csdn.net/weixin_43971764/article/details/96754325

-------------本文结束感谢您的阅读-------------